
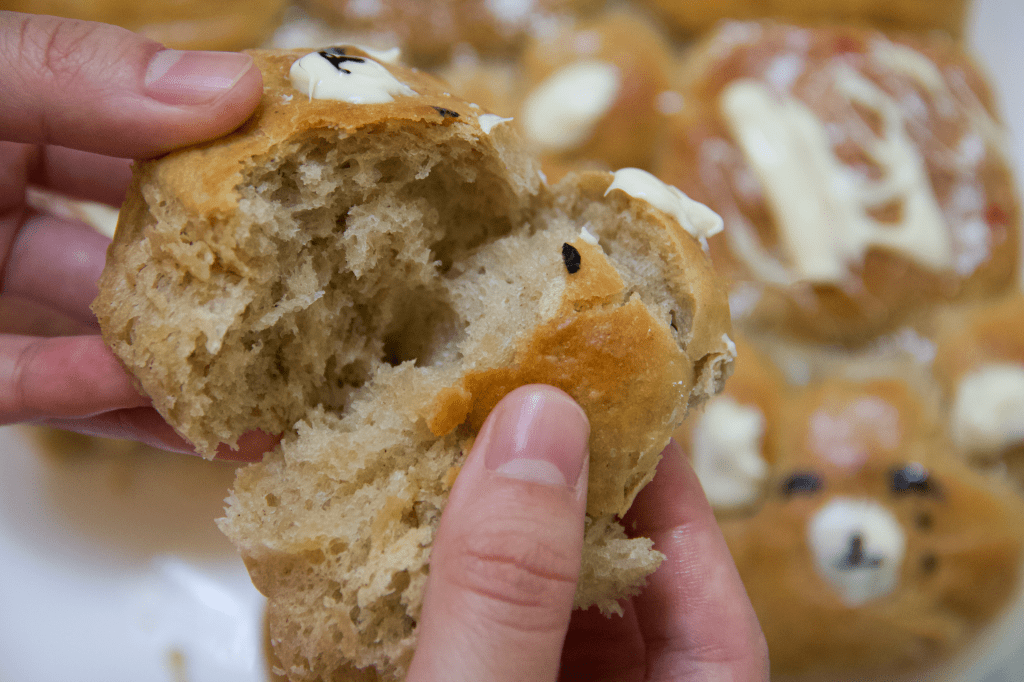
I’m definitely a fan of bread that bounces back when you squish it. Whenever I go to Texas Roadhouse, I can’t resist scarfing down several of their famous, bouncy honey butter rolls (even though the food’s not my favorite). This recipe, however, is definitely an upgrade. Soft Japanese milk bread meets fragrant Earl Grey tea to bring you the best rendition of an Earl Grey milk latte — but in carb form (the best form).
If you’re not a fan of Earl Grey flavoring, then feel free to leave out the tea infusion process and just use regular whole milk. The overall result is a super fluffy, milky, and moist bread that you can pair with either whipped butter, jam, or just eat plain!
The secret to making these rolls so fluffy is a starter called a tanzhong. This is essentially a roux that pre-gelatinizes the starches in the flour so they can absorb more water. This in turn means:
- it’s less sticky and easier to knead
- rolls rise higher
- bread and rolls will be more moist and will stay soft and fresh longer
All you need to do is combine flour, milk and water in a small saucepan and heat it briefly until it thickens to the consistency of loose roux. Once it starts leaving ribbon lines on the bottom of the saucepan, its done!
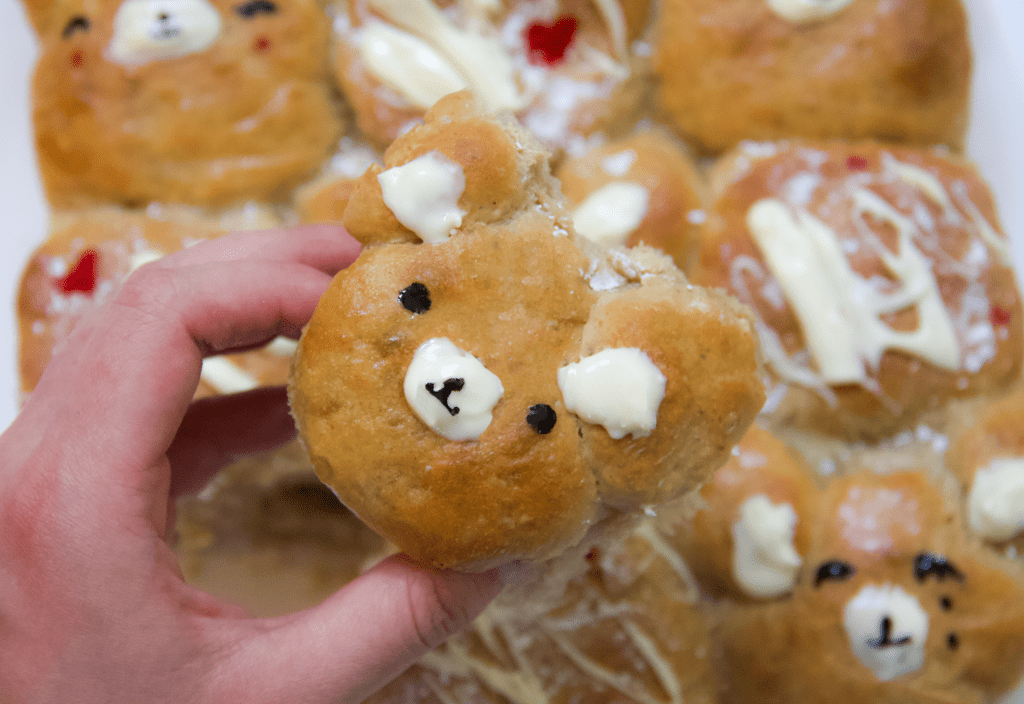
These are also super fun to make with/for family and friends as you can decorate them with cute characters and animals. It’s definitely a great canvas for someone’s more creative side. I decorated with black and red food coloring, powdered sugar, and white chocolate. In addition, you can also swap tea flavors or infuse your milk with a flavoring of your choice. Hope you try these and put your own little spin on them!
- Difficulty: ★★★
- Ingredients: ★
- Time: ~3 hours
For the Tanzhong (roux starter)
- 3 tbsp water
- 3 tbsp whole milk
- 2 tbsp flour (all-purpose or bread)
Bread Dough
- 2 1/2 cups flour (all-purpose or bread)
- 2 tbsps dry milk powder (optional)
- 1/4 cup sugar
- 1 teaspoon salt
- 1 tablespoon instant yeast
- 1 earl grey tea bag or 1 tbsp loose leaf earl grey tea
- 3/4 cup whole milk, slightly warm
- 1 large egg
- 1/4 cup melted unsalted butter
- melted white chocolate (for topping***)
Egg Wash
- 1 egg
- 1 tablespoon heavy whipping cream or milk
To make the Tanzhong (STARTER):
- Combine water, milk and flour in a small saucepan, and whisk together until no lumps remain.
- Place the saucepan over low heat and cook the mixture, stirring constantly using a rubber spatula or whisk, until thickened to the consistency of loose roux and the spatula/whisk leaves ribbon lines in the bottom of the pan when dragged through. This could take anywhere from 3-10 minutes (be patient!).
- Transfer the tangzhong to a small bowl, cover, and let cool to room temperature.
Making the Dough
- Milk tea infusion: pour 3/4 cup of whole milk in a small saucepan and add the tea bag or loose leaf tea into the milk. Simmer on low-medium heat for 10-12 minutes, stirring occasionally so the milk doesn’t burn. Transfer to a bowl or measuring cup and let it cool. Ideally you should be left with 1/2 cup of infused milk at the end.
- In a large bowl, whisk together the flour, milk powder (optional), sugar, salt and yeast
- In a medium bowl whisk together the milk, egg, melted butter and cooled tangzhong until well combined. Make the sure butter is COMPLETELY melted.
- Pour the wet milk mixture over the flour mixture and with the mixer on low speed, knead together using the dough hook until a dough forms (or by hand*). The dough will be very sticky when mixing begins, but resist the urge to add more flour – the dough will come together!
- Increase the speed to medium low and continue kneading until a smooth, elastic dough forms and is no longer sticky. ~ 15 to 20 minutes.
- The dough should feel tacky (slightly sticky but not messy) and should easily come together in a ball when handled with lightly oiled hands. If this is not the case, then knead in a little more flour, one tablespoon at a time. A good indication of telling when the dough is ready, is being able to stretch between your hands into a thin film without it breaking right away. When it starts tearing, they will be circular(-ish) holes.
- Using lightly oiled hands, shape the dough into a ball, and transfer to a lightly greased large bowl. Cover tightly with plastic wrap and allow to rise in a warm place, until almost doubled in volume, 60 to 80 minutes. I would suggest proving your dough in a warmed up microwave (microwave for 1 min, then put in dough)
- Turn out the dough onto a work surface (no flour). Pat the dough gently into an 8-inch square of even thickness. Using a bench knife or chef’s knife, cut the dough into 9 pieces (3 x 3).
- Spray (or grease) an 8 or 9-inch square pan with non-stick cooking spray. Working with 1 piece of dough at a time and keeping remaining pieces covered, form dough pieces into smooth, circular rounds.
- Place the rolls into the prepared pan. Cover the pan loosely with plastic wrap and allow the rolls to rise for 40 minutes until puffy. In the last 10 minutes of rising, preheat the oven to 350°F/180°C.
- Prepare egg wash by whisking together the egg and heavy cream. When ready to bake, remove the plastic wrap from the pan, then gently brush the rolls with the egg wash. Bake the rolls for 20 to 25 minutes, until golden brown on top!
- Remove the rolls from the oven, then brush with the 1/2 tablespoon melted butter if you want shiny tops. Allow them to cool in the pan for 10 minutes before taking out of the pan.
- Serve warm or at room temperature with anything you want! I like them drizzled with white chocolate, but you can make your own honey butter as well **
*if kneading by hand -> mix ingredients until combined, then knead in your large bowl by folding the sides of the dough into the middle while turning the bowl after each fold. Repeat this circular kneading pattern for about 20-25 minutes until the dough is only slightly sticky and comes out of the bowl cleanly (it took me 25 min).
**whip butter with cinnamon and honey to taste
***I highly recommend white chocolate as a topping as it pairs really well with the earl grey flavoring

These do really look bouncy and cute! 😀
LikeLike
I can’t wait to try this! I make Earl Grey cupcakes with a lavender infused buttercream. I bet these would be AMAZING with lavender butter!
LikeLiked by 1 person
That sounds amazing! I may give that a try myself!
LikeLiked by 1 person